


Laser Level Not Level How to Fix It
Laser level calibration starts with a check, not an adjustment. If your laser level is not level, stop marking and identify the symptom first: the line is flashing, the line is steady but the surface looks crooked, or a repeatable accuracy check shows a gap. Each symptom has a different fix. A drop or hard bump is a reason to run the accuracy check before relying on the line.
This guide separates a setup problem, a room that is out of square, and a tool that needs service. It also gives you a two-wall, 180-degree accuracy check. The check tells you whether to trust the reference line; it is not a calibration certificate.
| What you see | Likely question | First action |
|---|---|---|
| Line flashes or will not settle | Is the pendulum locked, or is the base outside its compensation range? | Stop marking. Check the mode, lock, and support. |
| Line is steady, but the wall or trim looks tilted | Is the target surface itself out of plumb or uneven? | Compare the line with a known straight or plumb reference. |
| Line is steady and repeatable marks disagree | Is the instrument outside its stated accuracy? | Run the two-wall check at a measured distance, then compare with the model specification. |
What not level can mean
A self-leveling laser establishes a reference relative to gravity. It does not make the wall, floor, or ceiling straight. Level is horizontal, plumb is vertical, flat describes surface variation, and square describes a 90-degree relationship. One test cannot answer all four questions.
For example, a floor can slope smoothly toward a drain. The horizontal laser line can be correct while the distance between the line and the floor changes across the room. A wall can be plumb at the corners and bow in the middle. The laser may look broken where it meets that surface even though the projected plane is stable.
If you are checking a wall, use the vertical method in how to check whether a wall is plumb. If you are choosing a tool for several reference planes, the laser level buying guide explains the difference between line coverage and accuracy.
Check the setup before calibration
- Release the transport lock. Find the lock or pendulum switch shown in your model manual. A locked pendulum is not the same as self-leveling mode. Move the switch to the released position before judging the horizontal line.
- Check for manual mode. Some instruments intentionally project a diagonal line when the pendulum is locked. That mode is useful for a sloped layout, but it is not a level reference. Turn it off for an accuracy check.
- Bring the support inside the compensation range. The current CIGMAN CM-701 product page lists a leveling and compensation range of 4 degrees +/- 1 degree and says the released tool flashes when it is beyond that range. Adjust the tripod head or move to a firmer surface until the line settles.
- Remove movement from the setup. Tighten the tripod head or bracket. Keep cords, clothing, and hands away from the stand. A laser that shifts after you mark can produce a perfectly straight set of wrong marks.
- Wait for a stable indication. Use the ready signal described in the manual. Do not use a fixed warm-up time from another model. Mark only when the line has stopped moving and the instrument gives no out-of-range warning.
- Use a clean, reasonably straight target. Dust on the optical window can spread the visible line. Clean it only as the manual allows. On a rough wall, place low-tack tape at the mark so you can identify the center of the beam.
In a workplace covered by OSHA construction rules, only qualified and trained employees should install, adjust, or operate laser equipment. Control direct and reflected exposure, and use the documented shutter, cap, or power-off step when transmission is not required. Home users should follow the model manual and applicable local requirements.
How to check laser level accuracy with a two-wall test
The useful field question is not "does this line look level?" It is "does the line return to the same reference after the tool is reversed?" Use the model manual first. The sequence below follows the horizontal accuracy-check geometry published in the online laser-level manual. It is a field check, not a calibration certificate or an instruction to adjust the instrument.
- Choose the test space. Find two reasonably flat, opposing walls with a measured gap that suits the model. the manual's example uses 5 m (about 16 ft) between walls, creating a 10 m total measuring distance. Do not use a generic distance when your manual gives a different one.
- Start near wall A. Put the laser on a firm, flat surface or stable tripod close to wall A. Release the pendulum, select automatic self-leveling and the horizontal plane. If you use a cross-line mode, keep the vertical line directly in front so you can identify the crossing point.
- Mark point I. Let the tool settle, aim at wall A, and mark the center of the horizontal line or line intersection. Use low-tack tape when the wall texture makes the beam wide.
- Mark point II on wall B. Without moving the base, rotate the instrument 180 degrees. Let it self-level again, then mark the line or crossing point on wall B.
- Move the setup near wall B. Keep the instrument's orientation from the previous step. Place it near wall B, switch on automatic self-leveling, and adjust only the height until the line or crossing point lands exactly on the existing point II.
- Return to wall A. Without changing the height, rotate the instrument 180 degrees. Aim the vertical reference through point I when using a cross-line mode, let the tool settle, and mark the new crossing point as III.
- Measure and repeat. Measure the discrepancy between points I and III. Repeat the complete check once. A changing result usually points to movement, a soft support, temperature effects, or inconsistent beam-center marks before it proves an internal calibration fault.
| Observation | What it represents | How to use it |
|---|---|---|
| Distance between I and III | Combined discrepancy over the two measured legs | Compare with the model's stated accuracy and test distance. |
| Result changes on repeat | Setup or marking repeatability problem | Stabilize the support and re-mark the beam center before diagnosing calibration. |
| Result repeats outside the model limit | Possible instrument error | Stop precision work and contact authorized service; do not turn internal screws. |
For a specification stated in millimeters per meter, calculate the permitted discrepancy from the total test distance, as the the manufacturer example does. If a product lists a value only at one distance, do not silently convert it into a pass/fail number at another distance. Record the test distance and ask the manufacturer which limit applies.
For the CM-701, the current product page lists leveling accuracy of +/-1.5 mm at 5 m. Treat that as the published model specification at 5 m. The product page does not publish a separate 10 m field-test limit, so do not label a 10 m result as pass or fail from a guessed conversion.
A repeatable result outside the model specification is a reason to stop using the tool for precision work and contact the manufacturer or service provider. This test checks accuracy. It does not recalibrate the instrument.
When the room is the reason the line looks wrong
Project the line onto a known straight target before calling the laser faulty. A clean edge, temporary board, or opposing wall can show whether the apparent slope belongs to the target. If the beam is straight there and bends on the original wall, inspect the wall.
For a floor or ceiling, decide which datum the project needs. A level reference compares elevations but does not measure local humps and dips. Use a straightedge and the material manufacturer's requirements for flatness. For trim, choose a true-level or visual reference deliberately and use it consistently.
Do not correct a wall by tilting the laser body in self-leveling mode. If you need a deliberate slope, use the tool's documented manual mode and label the resulting line as a slope reference. For basic setup and line selection, see how to use a laser level for beginners.
Fix a flashing or unstable line
The pendulum is locked or manual mode is on
Turn the tool off, move the lock to the self-leveling position, and power it on again. Controls and indicator patterns vary by model. If the line is intentionally diagonal and stable, the tool may still be in manual mode. A diagonal line is not evidence of a failed calibration.
The support is outside the range
Set the laser on a rigid surface or adjust the tripod legs. A soft box, loose board, or vibrating stand can keep the compensator from settling. Once the line steadies, leave the stand alone and recheck the first mark before continuing.
The warning remains after the reset
Check the manual for the model's warning pattern. If the pendulum is released, the support is stable, and the line still flashes, inspect the housing, pendulum window, and optical window for impact damage. Do not use the line as a reference while the warning remains.
When a laser level needs service
- The instrument was dropped, crushed, or struck and the two-wall result is repeatably outside its specification.
- The line is steady but the accuracy check fails from more than one setup.
- The housing, pendulum, lens, or control switch is cracked, loose, or visibly damaged.
- The beam has a persistent kink or step on a known straight target after the optical window is clean.
- The tool gives an out-of-range warning on a firm, correctly positioned support even after the documented reset.
Most owners can check accuracy. Actual calibration changes the internal reference and requires the manufacturer's procedure and equipment. Do not open the housing or turn adjustment screws unless the manual explicitly authorizes that work.

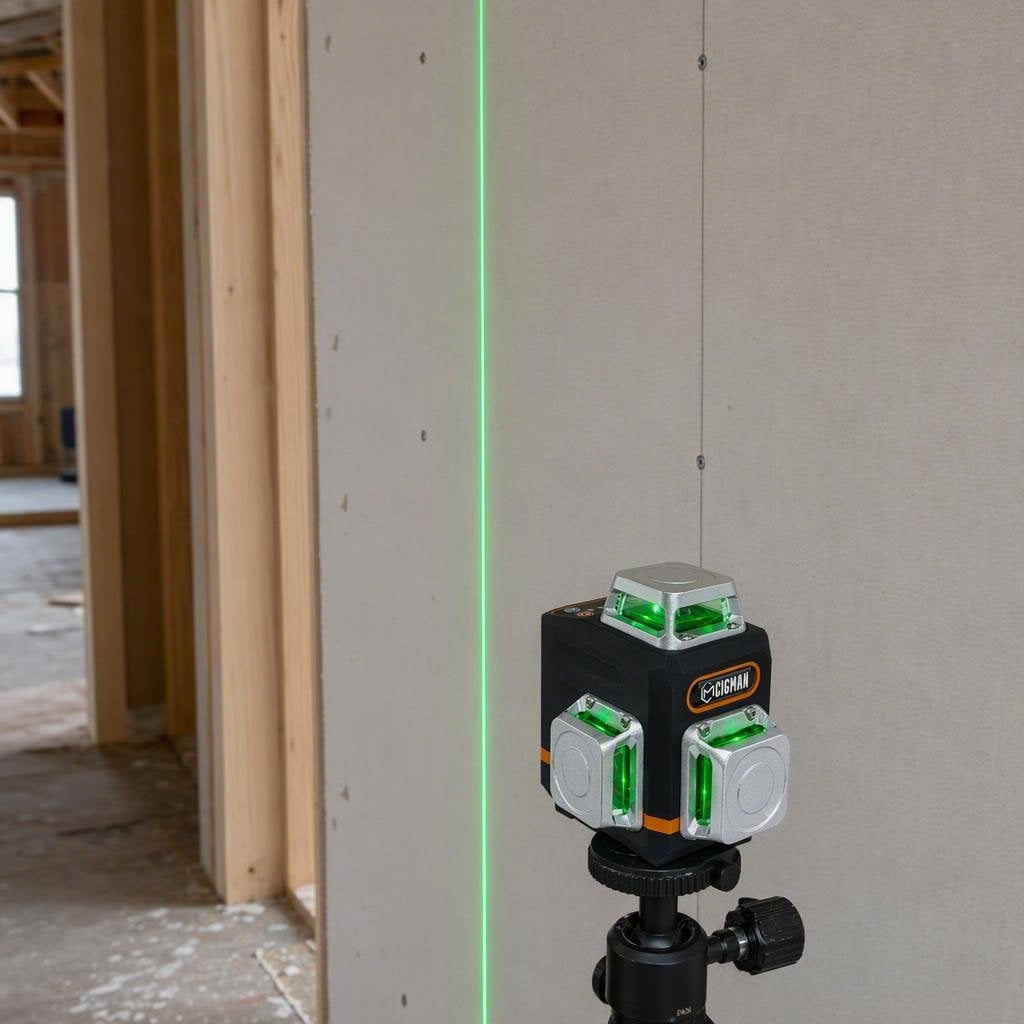
CIGMAN CM-701 3 x 360-degree Laser Level
The current product page lists 3 x 360-degree green planes, leveling accuracy of +/-1.5 mm at 5 m, a 4 degrees +/- 1 degree compensation range, a 30 m line working distance, manual mode, and Pulse Mode for a compatible receiver. The receiver is not included.
That specification can help you choose a reference tool, but it does not replace the setup and accuracy check above.
Laser level calibration FAQ
Why is my laser level flashing?
Check the transport lock, manual mode, and the stability of the support. A released tool can flash when it is outside its self-leveling or compensation range. Do not mark until the warning stops and the manual's ready indication is present.
Can a laser level be wrong even when the line is steady?
Yes. A steady line can still be outside the instrument's accuracy specification after an impact or internal shift. It can also be correct while the wall or floor is out of plumb. Use a known straight target and the two-wall check to separate those cases.
How do I check laser level accuracy?
Place the tool between two opposing walls, mark both walls, rotate the instrument 180 degrees without moving the station, and mark both walls again. Measure each pair of marks. The estimated one-way error is the measured gap divided by two, which you compare with the model specification at the same distance.
How do I calibrate a laser level?
Most owners should perform an accuracy check rather than adjust the tool. If the repeatable result is outside the manufacturer's specification, use the stated service or calibration route. Do not turn internal screws based on a generic online threshold.
Does a laser receiver fix an inaccurate laser?
No. A receiver helps you detect a compatible pulsed beam when light or distance makes it hard to see. It does not correct the beam's level, plumb, or calibration. Verify the exact laser and receiver pairing before using one.
Why does the laser line look crooked on my wall?
The wall may be uneven or out of plumb. Project the line onto a known straight target and compare it. If the beam is straight there, measure the wall rather than tilting the laser to match it.
References
- [1] CIGMAN, "CM-701 3x360-degree Self-Leveling Green Laser Level," CIGMAN. Open the current product page. Verified August 31, 2026.
- [2] University of California Agriculture and Natural Resources, "Laser Leveling Training Manual," UC Davis. Open the training manual. Verified September 2026.
- [3] U.S. Occupational Safety and Health Administration, "29 CFR 1926.54 Nonionizing Radiation," United States Department of Labor. Open the regulation. Verified August 31, 2026.
- [4] CIGMAN, "Manuals & Downloads," CIGMAN. Open the manuals page. Verified August 31, 2026.



Leave a comment
This site is protected by hCaptcha and the hCaptcha Privacy Policy and Terms of Service apply.