


How to Check If a Wall Is Plumb With a Laser Level

Short answer: To check if a wall is plumb, project a vertical line from a self-leveling laser, then measure the gap between the line and the wall at the top, middle, and bottom. A consistent gap means that section of wall follows the vertical reference. A gap that changes means the wall leans or bows. The laser gives you a gravity-based reference; it does not make an uneven wall straight.
This method works for drywall, framing, a door jamb, a window jamb, or the side of a cabinet. You need a self-leveling line laser, a stable support, and a ruler or tape measure. If your project also needs a horizontal reference, use the same setup with the horizontal line switched on.
What it means for a wall to be plumb
Plumb means vertical in relation to gravity. Level means horizontal. A wall can be level across its top edge and still lean from floor to ceiling, so checking one direction does not prove the other. A wall can also be plumb on one vertical run and bow a few inches away from it.
A line laser creates a reference plane rather than a physical edge. Treat the vertical line as the reference and compare the wall face with it. That is why the measurement is the distance from the wall face to the beam, not the apparent angle of the beam itself.
Use the word plumb for the wall's vertical position and flat or straight for bumps across its face. A laser can show both, but the readings are different. If the gap changes as you move sideways, you are finding a surface that is not in one plane. If it changes from top to bottom on one vertical run, you are checking plumb.
For a quick terminology refresher, the laser level buying guide explains when a line laser, dot laser, or rotary laser fits a project.
Set up the laser for a reliable plumb line
- Choose the face you will measure. Clear furniture and loose material so the beam reaches the same wall face from top to bottom. If the wall is textured, plan to measure to the brightest center of the line rather than to a scattered edge.
- Put the laser on support that will not move. A firm floor, shelf, wall bracket, or tripod can work. Do not rest it on a surface that flexes when you touch the wall or walk past it. A small movement changes every later reading.
- Release the transport lock and select the vertical line. A locked pendulum is intended for transport or manual-angle work. It is not the reference you want for a plumb check.
- Wait for a steady line. If the line flashes or keeps moving, stop. The tool may be outside its self-leveling condition or still settling. Reposition it on a steadier, flatter support and check the manual before marking.
- Place the line beside the wall, not over an obstruction. You need a visible gap that can be measured. If trim or a cabinet blocks the beam, move the laser and repeat the check from the new position rather than guessing where the hidden line would be.
The current CIGMAN CM-701 product page says to release the pendulum lock for self-leveling within its stated compensation range and says the laser keeps flashing outside that condition. That behavior is specific to the CM-701. Other models can use different indicators, so use the manual for the laser in your hand.
How to check if a wall is plumb
- Pick one vertical run. Stand the laser so the vertical beam is parallel to the wall face and visible for the full height you need to inspect. Mark the top and bottom of the area you will compare. Do not use the floor or ceiling as your only reference because either one can be out of level.
- Measure the top gap. Hold the ruler square to the wall and measure from the wall face to the center of the laser line. Keep the ruler orientation the same for every reading. Record the value instead of relying on your eye.
- Measure the middle and bottom gaps. Take the same reading at the middle and bottom. For a tall wall, add readings between those points. More readings help distinguish a smooth lean from a local bulge.
- Compare the pattern. If the gaps are the same within your tool and reading tolerance, that run is plumb. If the gap grows steadily from one end to the other, the surface leans. If the top and bottom are close but the middle is different, the surface bows rather than making one simple lean.
- Repeat across the wall. Move the laser to a second vertical run and repeat the readings. A single column can miss a stud hump, a seam, or a bowed section beside it. Keep the new setup stable and recheck the reference before comparing results.
For a simple lean, estimate the out-of-plumb amount as largest gap minus smallest gap over the height you measured. For example, if the top gap is 3/16 inch and the bottom gap is 1/16 inch, the difference between those readings is 1/8 inch over that measured height. This is a comparison of your readings, not a promise that the wall is straight between them.
Measure to the same surface each time. If the wall has a thick texture, use a small straightedge or a consistent contact point so you are not comparing a paint ridge at one height with a low spot at another. The beam's center is the reference; the fuzzy outside glow is not.
When the wall is covered by cabinets or trim, measure the exposed framing or the finished face before installation. Once the material is fastened, check the material itself as well. A plumb cabinet can stand in front of a wall that is not plumb, and a wall that is plumb does not prove a cabinet was installed without twisting.
Use the result on jambs, cabinets, and tile
Door and window jambs
Project the vertical line just beside the hinge jamb or the side you are checking. Read the gap at the top, near the middle, and at the bottom. If the gap changes, adjust the jamb with paired shims and fasten it again. Recheck the three points before hanging the door. The goal is a consistent jamb-to-line gap, not a jamb forced against an uneven stud.
Cabinet sides and runs
Check the cabinet side against the laser after the cabinet is supported and before final tightening. If the wall bows, use shims behind the cabinet where the wall is low. Do not pull the cabinet face into a wall by tightening one screw; that can twist the box while making the back look flush. Use the laser for the vertical reference and a separate horizontal line for the cabinet elevation.
A 360-degree line can make a long run easier to transfer from one wall to the next. The ceiling-work guide shows the same idea for a room-wide reference, while this page focuses on reading the vertical gap at one surface.
Tile and wall finishes
Use the vertical line to establish a straight starting edge for tile, paneling, or wainscoting. Check the wall before spreading adhesive so you know where shims, a trued substrate, or a layout adjustment may be needed. A plumb reading does not tell you whether the wall is flat enough for large tile. Check the finish manufacturer's flatness requirement separately; our guide on using a laser level for flooring and tile covers that distinction.
Tolerance, mistakes, and safety checks
How much out of plumb is acceptable
There is no single tolerance that applies to every wall, finish, or jurisdiction. WoodWorks summarizes commonly accepted light-frame construction guidance and notes that these figures are guidelines rather than a universal requirement in the International Building Code. Its examples include 1/4 inch in 8 feet for studs where wallboard, plaster, or ceramic tile set in a mortar bed will be used, and 1/8 inch in 8 feet for some ceramic tile installations using dry-set mortar, latex-portland cement mortar, or organic adhesive.
If your reading exceeds the finish requirement, decide whether the problem is a local hump, a continuous lean, or a structural condition. Shims and surface correction can address a finish problem. A large or changing movement in a load-bearing wall is outside this article's scope and needs an appropriate building professional and the local inspection requirements.
Keep the measurement record with the project notes. A short table of top, middle, and bottom readings makes it easier to explain why a jamb was shimmed or why a tile layout was moved.
Common mistakes and safety checks
The line is flashing
Do not mark from a flashing line. On the CM-701, the product page identifies flashing as the signal that the tool is outside its self-leveling condition after the pendulum lock is released. On another model, flashing can have a different meaning or can indicate a selected mode. Check the manual, release or level the tool as directed, and wait for a steady reference.
The gap changes only in the middle
That pattern usually points to a bow or a local obstruction rather than one uniform lean. Take more readings around the change and inspect the surface with a straightedge. Do not average the readings and call the wall plumb; the middle condition may be the part that prevents a cabinet or tile finish from sitting flat.
The wall and the cabinet disagree
Check the laser setup first, then check the cabinet on its own. Confirm the cabinet is resting on its intended support, that no screw is pulling one corner out of position, and that the beam is reaching the same face at every height. If the tool was dropped or the readings do not repeat from a second setup, pause the installation and use the laser level troubleshooting guide before trusting the result.
The beam is hard to see
Dim the light on the target surface, shade the beam path, or use a target plate. Do not estimate the line from a faint glow. For outdoor or long-distance work, check whether the exact laser model supports pulse mode and whether the receiver is compatible before switching modes.
Basic eye protection
Keep the beam below eye level when possible, never stare into it, and avoid mirrors, polished metal, and glass that can reflect it. OSHA 29 CFR 1926.54 sets construction controls for direct or reflected laser exposure; home users should also follow the laser's class label and operating instructions. Turn the tool off before moving it or packing it away.

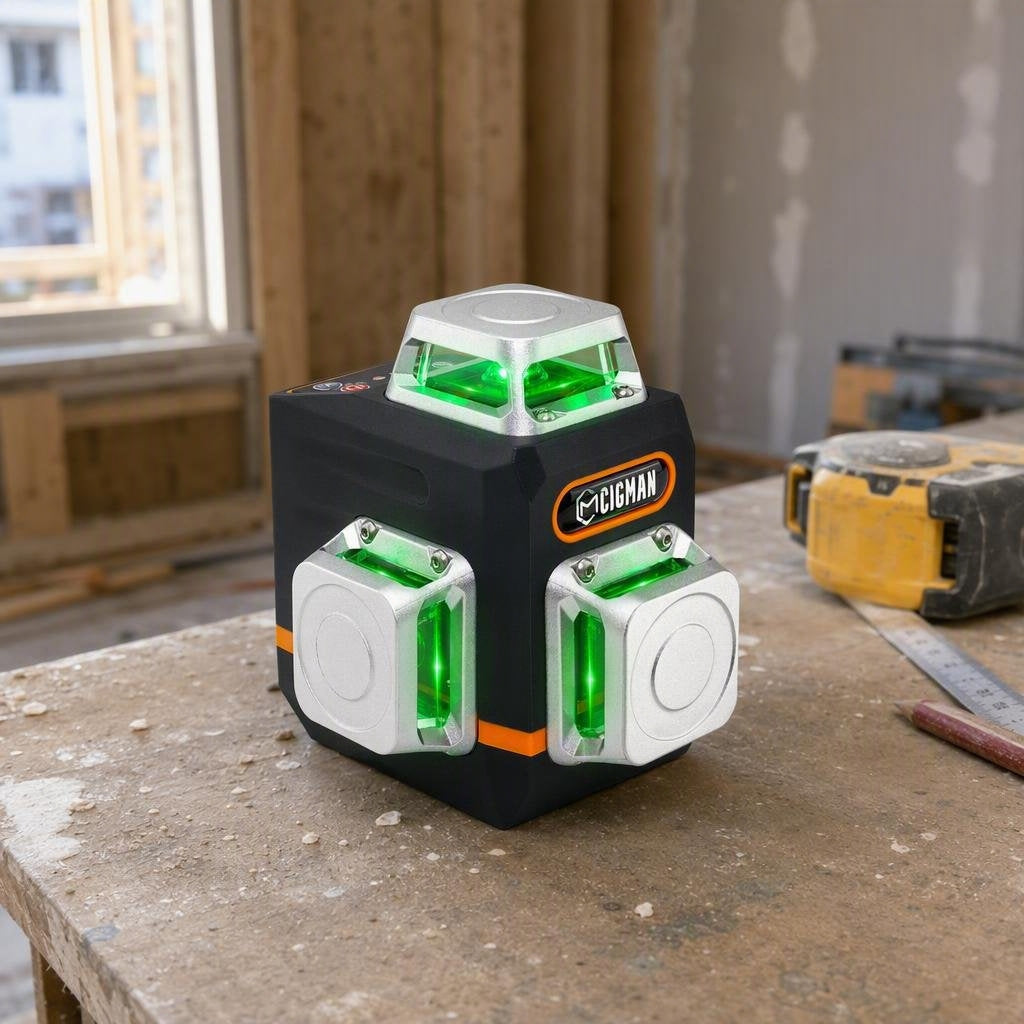
CIGMAN CM-701 3 x 360-degree Laser Level
The CM-701 projects one horizontal and two vertical 360-degree lines. Its product page lists a 30 m line working distance, plus or minus 1.5 mm per 5 m leveling accuracy, a 4-degree plus or minus 1-degree compensation range, and a rechargeable 4000 mAh battery. Check the current product page for included accessories and model-specific limits.
Frequently Asked Questions
Can a laser level tell me if a wall is plumb?
Yes, when the tool is self-leveling and the wall is compared with its vertical reference. Measure the gap at several heights. Equal readings mean that run follows the reference; changing readings show a lean or bow.
Should the laser line touch the wall?
No. Leave a visible, measurable gap. The exact distance from the tool to the wall is less important than keeping the beam parallel to the face and measuring the same surface at every height.
What if the wall is plumb but not flat?
A wall can keep the same top-to-bottom gap and still have a sideways hump or hollow. Repeat the check across several vertical runs and use a straightedge when the finish requires a flat surface.
Do I need a tripod?
You need stable support, but it does not have to be a tripod. A firm shelf or bracket can work if it cannot shift. A tripod is useful when you need adjustable height or a clear line across a room.
What should I do when the readings are outside the finish tolerance?
Compare the measured difference with the finish manufacturer's requirement and the applicable construction guidance. Then correct the cause: shim a jamb or cabinet, flatten a local high spot, adjust the layout, or ask a qualified professional to assess a larger structural issue.
References
- [1] WoodWorks, Wood Products Council, "Construction Tolerances for Light Wood-Frame Projects," WoodWorks. Open the precise resource page. Verified August 31, 2026.
- [2] Occupational Safety and Health Administration, "1926.54 Nonionizing Radiation," United States Department of Labor. Open the regulation. Verified August 31, 2026.
- [3] CIGMAN, "CIGMAN CM-701 3x360-degree Self-Leveling Green Laser Level," CIGMAN. Open the current product page. Verified August 31, 2026.



Leave a comment
This site is protected by hCaptcha and the hCaptcha Privacy Policy and Terms of Service apply.